Many of you already listen about CCleaner. It is a simple and powerful tool to clean up your system and remove unwanted things. And it is the easiest way to clean up right-click menu in Windows with CCleaner. Let’s know how to use it as a context menu editor.
Edit Right-click Menu with CCleaner
Before going to remove Windows right click options, make sure that you have the latest version. If you are new to know about this, then you can download it from here. After downloading the latest version, install it on your computer.
1) Open CCleaner and you’ll see a list of blue colored boxes on the left side. Click on the Tools box, and then click on the Startup button.

2) Now click on Context Menu tab to customize your right-click options.
3) Here you’ll see a bunch of lists which is present on your right-click menu.
4) You can select one by one or can select multiple items by pressing CTRL button on your key board.
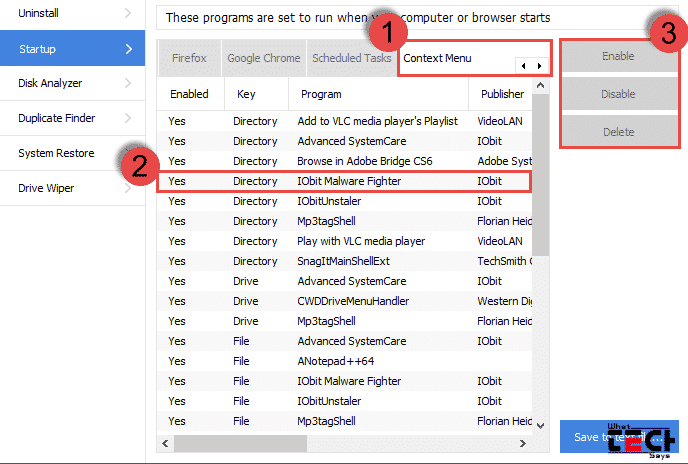
5) After selecting, you can do two tasks. Either you have to click on Disable button or Delete button. If you are clicking on Disable button, then you can Enable it in the future. Delete option has no reverse process. So, it is better to choose Disable option.
Conclusion
Remove Windows right click options will not affect the installed program in anyway. So, it is safe to use. CCleaner is a powerful tool, which available for all platforms, even for mobile devices. I am an old user of CCleaner and very much satisfied with its functions.