It’s amazing if you would like to record a gameplay, walk someone through a tutorial in a program, display a bug, and much more, and it’s available on iPhones and iPads running iOS 11. Earlier it was only available on Jailbroken Apple devices and you could only record your screen using a third-party software on your computer. Apple always adopts the best jailbreaking features and this is one of them. Well, let’s know how to do it.
How to Enable Screen Recording in iOS 11
I have already shared the tutorial on how to manage and customize Control Center in iOS 11 on iPhone or iPad. You should follow the guide to know more about the Control Centre. Here I’m using my iPad to demonstrate the guide. Well, let’s come to the tutorial.
1. At first, open Settings app on your iDevice.
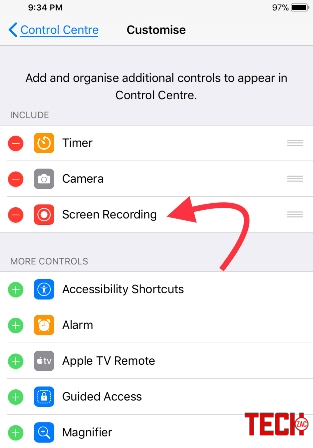
2. Next, navigate to Control Centre → Customise Controls.
3. Here you’ll get the complete list of Control Centre shortcuts. Now, you just need to tap on the green “+” button to the left of “Screen Recording” option to add it to Control Centre. The “Screen Recording” should be under the INCLUDE section. That’s it.
Once you enabled the Screen Recording option to the Control Centre menu, you are ready to begin the recording process.
How to Record your iPhone Screen without Jailbreak or Computer
With screen recording on iOS 11, you will have the ability to assist family members with their application phobias, document bugs to ship to programmers, or even make application walkthrough videos on the go. Since screen recording on iOS 11 records everything you can do, it’ll also catch those moments once you shut Control Center or stop a recording. To create your videos look a bit cleaner, make certain to trim the first and final few minutes of this video in the Photos program. Let’s get started.
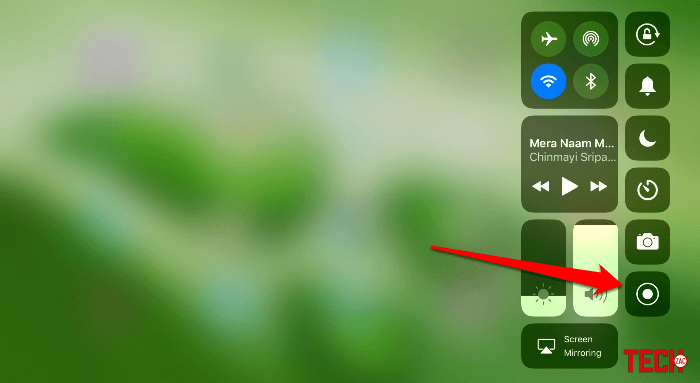
1. In order to start screen recording, open Control Center by swiping up from the bottom of the Home screen.
2. Now, tap the Screen Recording button. It’ll take three seconds of countdown process within the button and the recording will start. The recording button appears to be a big dot within a circle and changes from white to red when recording.
Remember that, it is a soundless recording clip. That means your video output will be muted. To record the screen with the sound you will have to follow the below steps.
How to Record iPhone or iPad Screen with Sound in iOS 11
The process is quite simple. In order to record your screen with sound, simply force touch the recording button (Apply 3D Touch) or if you have an iDevice without 3D Touch, then you can long press on the icon to avail the additional options.
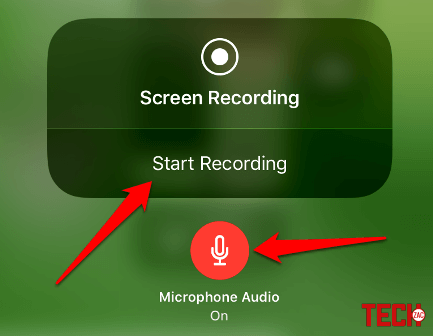
Next, you need to tap on the microphone icon in the shortcut menu. The icon will become red with an “ON” message. Now you have to tap on the “Start Recording” button to start the recording process.
How to Stop Screen Recording in iOS 11
There are two easy ways to stop the recording process on iPhone or iPad in iOS 11. Let’s know about them.
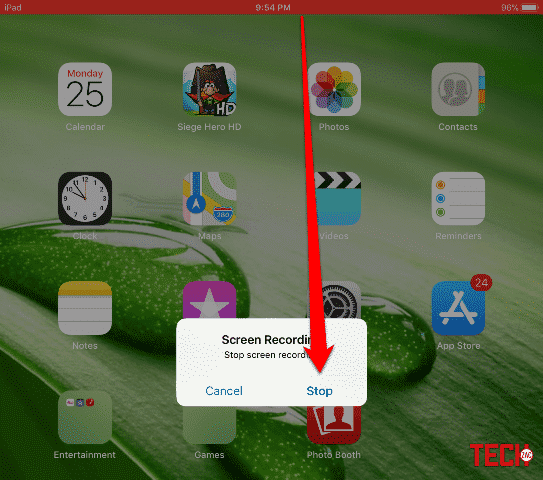
1. Once you have finished the recording, tap on the red color status bar at the top of the screen and confirm it by tapping on the “Stop” button.
2. Another way is, open the Control Centre by swapping the screen from the bottom. Next, 3D Touch or long press the recording button and tap on Stop recording button. Or, simply tap the recording button to stop the recording.
A banner notification will let you know the screen recording has been stored in Photos. It’s possible to tap that notification to start Photos and find it in your Camera Roll.
How to Edit Screen Recording Videos in iOS 11
If you want to trim the video, then you can easily edit it to remove a part of a clip. In order to do that,
1. Open Photos app → Camera Roll and select a video.
2. Now tap on the “Edit” button from the top of the screen
Here you can cut your clip and make a new video from the existing. Select the part which you want to export and tap on the “Done” button to save the video.
This was the complete tutorial on how to record iPhone or iPad screen without Jailbreak or Computer in iOS 11. The benefits of screen recording on iOS 11 does mean third-party programs will need to rethink privacy within their transient content services. While maybe not the provider’s main directive, programs like Instagram and Snapchat might desire to check into educating users to the changes which built-in screen recording will bring.